Publishing with CreateSpace by Susan Price

I don't claim any great expertise - what I know I've learned by having a go, failing and failing better. I wouldn't be at all surprised to learn that I am making some very obvious mistakes. My hope for this post is simply that it will make the process seem more familiar for those who haven't used Createspace before and so take some of the fear out of it.
Why should we all be publishing with Createspace?
Well, I'll take last month, March, as an example. It wasn't my best sales month. During March, I sold 6 Kindle books in total, in all markets, though several more of my books were read for free (with Amazon making a small payment to me from a central fund, rather as PLR works.)
In the same month, through Createspace, I sold 21 paperback books - that's three and a half times as many, in a poor month, as on Kindle. I made a greater profit on each book too.In November 2015, I published a picture book with my brother, The Runaway Chapatti. It has been selling at a rate, roughly, of one a day since publication. In March, not its best month, it still sold 15 copies. This may be far from putting us both on Easy Street, but no e-book of mine has sold as well. (These 15 copies are not included in the 21 mentioned above, since the Chapatti is sold from my brother's account, not mine.)
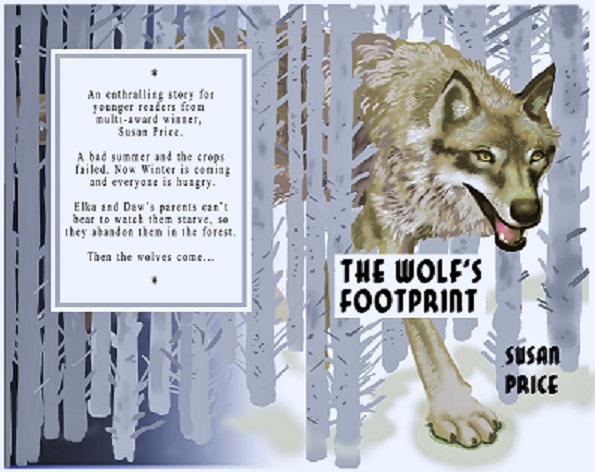 |
| The Wolf's Footprint, by Susan Price |
At 11am my dashboard showed that I'd sold one copy of Footprint.
At 5pm that one copy had become eleven copies. Somewhere in Britain, someone had bought ten copies at once. Who knows why? - someone with a large extended family of children, stocking up for birthdays? A schoolteacher spending her own money on books for her class (I've been told that most schools aren't 'allowed' to buy from Amazon.) A bookshop? It's impossible to know, but it's not the first time that Footprint has sold several copies at a time like this.
We forget, in all the excitement of e-books, that the majority of books sold are still paper books - and some people buy both paper and e-copies.
The Basics
Here are the basics I've learned about putting a book on Createspace, as a POD (Print On Demand) paperback. If my instructions sometimes seem too obvious, then it's because I'm deliberately being as obvious as possible. Sometimes it's a tiny detail that it's assumed you'll figure out for yourself which, in fact, frustrates you until you give up.I've made the illustrations very large, so they're easy to see. This will make them overlap the blog's sidebar. Apologies for that.
Although Createspace is 'Amazon' it operates as a separate company, so you have to go to the site and open a free account with them, just as you did with Kindle.
Once your account is open, you have your 'Member Dashboard.' At the top left corner of your screen, under 'Amazon company' it says 'Member Dashboard' and under that, 'Add New Title.' I've circled it in red. Click 'Add New Title' to start your new book.

This brings you to this screen, the 'Project Homepage':-

Be calm. All those columns full of writing may seem confusing. Worry not. You need only be concerned, for now, with the highlighted column second from the left.
Click on the first line in the column, 'Title Information.' That will open a form to fill in. Enter your book's title, your name, and so on.

If your book is part of a series, or a projected series, tick the box 'This book is part of series.' Insert the volume number (is it book 1, 2, 3 or higher?) If you do this, then Amazon will flag up the other books in your series when it's published.
When you've completed the form, look at the column on the left. It remains the same all through the process of setting up your 'project' or book.
You can deal with the items in the column now - or you can tackle them later. As long as you complete them all before you submit your book for pre-publication review, that's okay.
Click on 'ISBN,' and it takes you to a page where you can either enter your own ISBN number, or accept a free one from Createspace. If you accept Createspace's ISBN, it simplifies matters, and it's free. It also makes your books available for sale to libraries in the USA, if that prospect interests you.
However, it also means that Createspace become your publishers and you can only obtain copies of your books through Createspace. Copyright still remains with you, and you can 'retire' your book whenever you want. (You have to contact Createspace to do this.) If you're happy with this, click the button for a C/S ISBN.
If you choose to have your own ISBN, you will have to pay for a block of them. It will be more expensive, but you will be free to have your books printed by any local printer. You buy them from Nielsen, in the UK. If you do this, then you enter your ISBN on this page.
Click on 'Interior' and it takes you to this page:-

Here is where you choose whether your book will be black and white or full colour and what kind of paper it will be printed on - cream or white. Just click in the circles beside your choice.
You also choose your 'trim size' or what size your book will be. Amazon recommends 6 inches by 9 inches or 'trade paperback.' (Amazon deals in inches.) This, according to Ammie is the most popular size with 'the widest distribution options' which is good enough for me. However if you dislike that size - and I know that some people do - click the 'Choose a Different Size' button and you will be offered several others.
This is the screen you get when you 'Choose A Different Size.'

Have a tape-measure on stand-by! Look at all the different sizes and decide which you want. For our picture books, the brothers and me chose the largest size Amazon offers, the 8-5 inches by 11 inches. (Always remember that Amazon uses inches, not the centimetres we've become used to.)
There are a couple of useful buttons at the bottom of the lit square. The dark blue button at bottom right, 'More Sizes' takes you to some square options, though they're all around 8 inches square, give or take.
The Compare all sizes [click here to be taken to it] link takes you to a visual comparison of the different sizes and also gives the measurements in centimetres.
When you've decided which size you want, click on it and you will be taken back to the Interior page, with your choice of trim size in place.
The next thing to do, if you're going it alone, is to download a template. I've outlined in red where you click to do this:

Download a FORMATTED template. It will be already formatted to your book's trim size. It has pages for a list of contents, acknowledgements and copyright.
As you add chapters, the template will automatically add page numbers.
Once you have the template downloaded, you can treat it much as you would any Word document you've created yourself. Rename the file with the title of your book, so you can find it easily.
Here's what it looks like. I've turned on the 'pilcrow' so you can see the 'end page' and 'end section' formatting. I've also circled the pilcrow so you can find it easily - it's that backwards 'P' character on your toolbar. It's useful to have it turned on at least some of the time while you're formatting. Then you can see where the format codes are.

Those big pilcrows after 'Book' and 'Title' are formatting marks - as is the trail after 'Author Name' and at the bottom of the copyright page. Turn off the pilcrow (circled in red on the toolbar above) and they will disappear. They won't appear in the final published book either, but they control the book's spacing.
I also have Word's 'Navigation' pane turned on, to the left. I've found this very useful for keeping track of where I am in a book. For instance, it helps me find the start of each chapter or story, so I can add the correct page number to the Contents page, without having to constantly scroll through the book or type words into the search engine.
To add your book's title, treat this template as you would any Word document. Put your cursor at the start of 'Book' and type in your own title. Either use 'insert' to overwrite, or delete 'Book' afterwards. If you want your title on one line, then delete 'Title.'
Follow the same procedure to turn 'Author Name' into your name.
For the copyright page, copy your copyright information from another book and insert in place of Amazon's copyright. To change font-size and line spacing, highlight and use your Word toolbar as you would in your own Word documents.
There is a space for an ISBN. Write in your own, if you have one, or the one Amazon has provided. If you forget, Amazon will insert a 'courtesy ISBN' when you send your book off in the 'complete set-up' stage. This is fine if you always wanted a free Amazon ISBN. If you didn't, you have to delete Amazon's and type in your own before publication, or you'll be stuck with Amazon as your publisher.
Below, this is what the chapters look like in your template:

The template comes with ten of these chapters, and then some pages formatted for 'back matter' such as 'About the Author.'
What if your book has more than 10 chapters? Our own Chris Longmuir passed on a useful tip - before you start inserting chapters, work out how many formatted chapters you need. Then copy extra chapters FROM THE MIDDLE of the template.
For instance, if your book has 21 chapters, then copy the formatted chapters 3-9. Insert the copies at the end of the Amazon-supplied Chapter 10. You now have 17 formatted chapters, with some of them duplicated.
Add the copied chapters again. Now you have 24 formatted chapters. Go through and change the chapter numbering so they read 1-24, and you don't get confused. This gives you enough formatting to include all your chapters, plus a few spares.
If you're using Word's Navigation Pane, highlight your chapter headings and click HEADER 1. The chapters will all appear down the left hand side, in Navigation Pane and you'll be able to click on any one of them and jump straight to that place in your file. (Doing this will make each chapter title huge, initially, and they will all jump to the left - but you can change their size, font and position using your usual Word tools. The Nav-Pane hyperlink will remain and it's very useful.)
Each chapter is headed
[Number] [Chapter Name]
You don't have to stick with this if you don't like it. If you just want a number, then delete Chapter Name.If you want 'Chapter 1' and then the name on a separate line, go ahead and alter it in Word, then save.
If your book is a collection of short stories and you just want the story's title and no chapter heading, then alter it. Whatever changes you make, make sure that each chapter/story heading is in the same style.
Each chapter or story is then inserted separately. You can't enter an entire book in one go, because of the formatting for each chapter break.
So go to your proof-read, finished master document. Highlight and copy the entirety of chapter one or the first story - without its chapter heading. Place your cursor in your formatted template, on the first line of 'Insert chapter one text here...' Paste.
The whole of your first chapter or story will appear.
Delete all of the 'Insert chapter one text here...' filler - being careful not to overrun and delete part of Chapter Two.
If you wish, you can now use Word tools to highlight the whole of your chapter and change the font and font-size. You can also fully justify the text.
You may have to insert paragraph indents. Don't use 'Tab.' Copy five spaces and paste them in where necessary. If you have the Pilcrow turned on, you can more easily see where your paragraphs end.
Repeat for every chapter or story. It's less tedious to do this in bursts of one or two chapters and take a break before you tackle the next few.
When all your chapters are in the book, delete any spares, and add your 'back matter,' which probably means 'About the Author.'
Now to go back to the front of the book and tackle the 'Contents' page. It will look like this:

If you don't want an 'Acknowledgement' then change it to 'Introduction' or 'Foreword' - or delete it.
It's when adding the page numbers that Navigation Pane becomes useful.
The screenshot below shows my computer, with the Word programme open. I have my book, Overheard In A Graveyard up on screen. This is a file formatted in one of Createspace's formatted templates. It's a Word file, and I'm treating it exactly like any other Word file.
Word's 'Navigation Pane' is turned on at the left. (To find Navigation Pane, AKA Document Map, look in Word's 'View' menu.
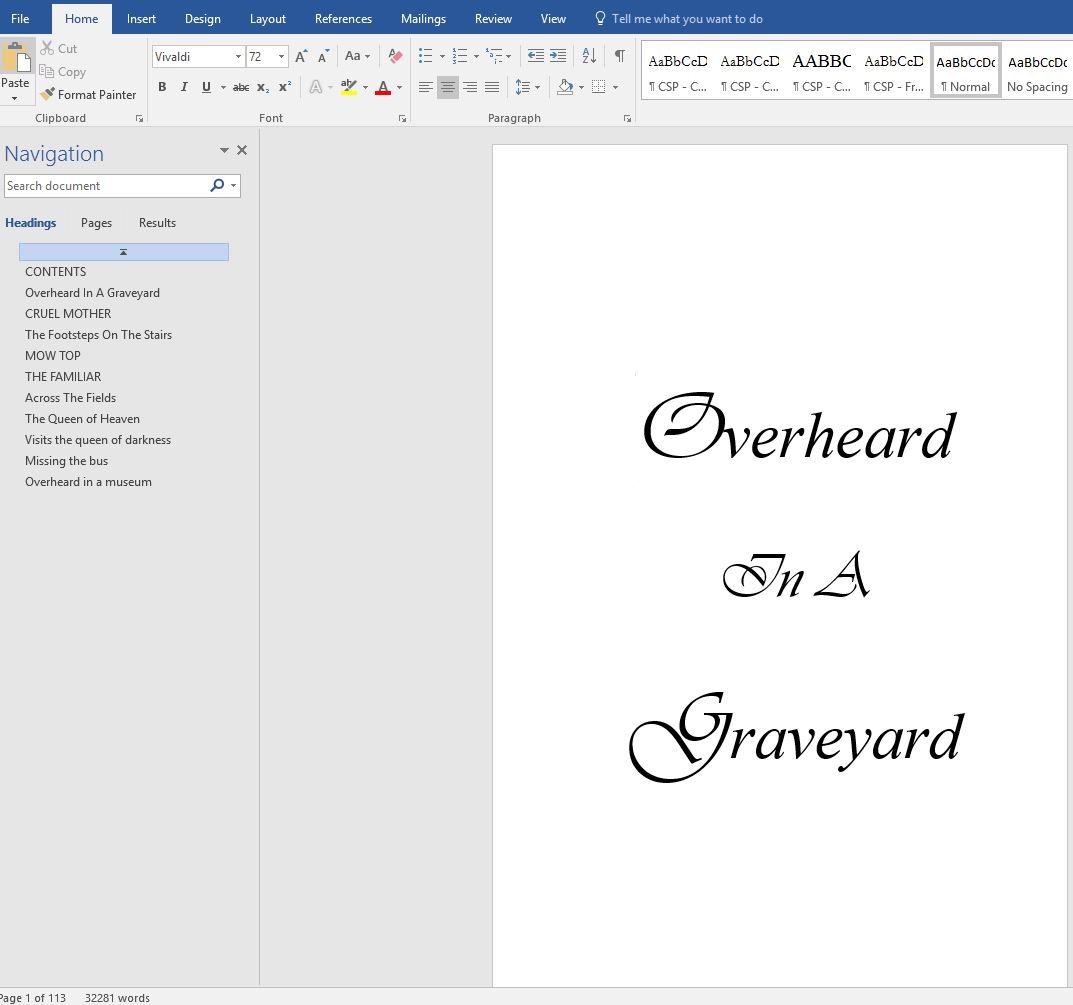
You can see that I inserted my own fonts for the title - Vivaldi for the capitals and Times Roman Italic for the rest. I've since decreased the spacing between the lines. (This works with Createspace, but won't translate to Kindle - unless, perhaps, you inserted the title as a graphic.)
To the left, in Navigation Pane, all the headings are the title of the stories in the book. They are also hyperlinks which, when clicked on, jump straight to that place in the file. So it's easy for me to jump from the Contents page to, say, the first page of the fourth story, Mow Top, and find out what page it starts on. Then I click on 'Contents' to return to that page and insert the page-number against the story. This saves a lot of time in scrolling up and down, or in typing words into 'search.'
When you have your book's interior as you want it, you return to Createspace and your Member Dashboard, click on your book's 'Project Homepage' and then the 'Interior' page. This time, you're looking to upload your file.


Click on 'browse' and a window opens showing the contents of your computer. Locate the file you want to upload, click on it, and then click 'Open.'
It may not be immediately obvious what to do next, especially if you're working with a small screen, such as a laptop or tablet. What you do is, scroll down the page until you see a SAVE button on the right. Click on 'Save.' Createspace will then start uploading and converting your file. It may take several minutes.
Once it's saved, you get to play with the 'book reviewer.' You'll see the screen below:-


Click on the pale blue button at the bottom of the square card: 'Get Started.'
Then you get this:-

Delete extra pages that you don't want, add blank pages, if needed. Correct typos.
If you can't see why, for instance, a page ends in mid-sentence, turn on the pilcrow so that you can see the formatting. There may be an 'end page' or 'end section' formatting which you need to delete.
When you've done your corrections, load the book up and check it again. You can upload your book as many times as you like, and play with the virtual book as many times as you like. Amazon takes its cut from the money you earn when your book is sold. (And their cut is tiny.)
If you look in the top right hand corner of the screen above, you'll see this:-

The familiar magnifying glass symbols, if clicked on, allow you to reduce or enlarge your view of your book. If you click on the grid of squares, you get this view, displaying your book as a gallery:-

When you've uploaded your book a few times, and you're happy with it, click 'save and continue' at the bottom of the page.
After that, all you have to worry about is designing the cover. Here's a rough for a new cover design for my ghost-story collection, Overheard In A Graveyard.

That is, of course, a whole new set of problems.
Susan Price is the Carnegie Medal winning author of The Ghost Drum and the Guardian Prize winning The Sterkarm Handshake (which is to be republished this summer.)
Comments
A point to note and the reason I recommend inserting extra chapters from the middle of the chapters the template gives you is because all the formatting for each chapter is in the page break at the end of the chapter. Delete that and you delete your formatting. Likewise, if you have to delete some template chapters which were not needed, delete the page breaks before the final one, leaving the final one in place. You don't really want page numbers and headings on your back matter. The same applies to front matter if you are deleting pages there do not delete the page break immediately before the start of the first chapter. The templates are great provided you use them correctly.
Great post Susan and I'm glad you've cracked it.
Createspace is a very restful and satisfying process. I've also earned money from The Oxford Editors for doing other people's books. I never in my wildest dreams thought I'd be paid for providing an IT service! Shame on you, Jan Needle. If I can do this, anyone can. I never thought I would use speech-to-text programs until you sang their praises. Just repay the compliment and do what I tell you for a change.
Your print vs ebook figures are interesting... do you think the block order might be libraries stocking up on your paperbacks?
Chris - thanks for that brilliant and very helpful explanation of which page-breaks to cut out! I am going to find that very useful in future.
It's good to know that you can do this, but I don't know that I shall. It's easier to let C/S look after all the formatting of chapter headings.
Thanks for the step by step instructions. Could you go one step further and explain how to change errors in the content (missing punctuation, etc.) on CreateSpace. My book has been out for 9 months and readers have been pointing out the mistakes. I reformatted the original manuscript (with the corrections) into a new PDF file, but am stuck on how to overwrite the original.